All Mine 2 Background

Showing posts with label My Home. Show all posts

Sunday, January 29, 2012

When Enough Is Enough - My Pantry Challenge

My pantry, it's a problem... Not the actual pantry, just the contents of the pantry. One of the things I like the best about this house is the storage... there's a lot of it, and the pantry is pretty good example of that. In fact, I can remember when I first moved in, I didn't even know what to do with it all. I had come from an apartment where my "pantry" was pretty much just a floor length cabinet about 12" wide, so this was a major upgrade for me. Well flash forward  about 4.5 years and I've figured out how to fill it to the brim! Between my stockpiling and my general "just put it in the pantry way of living", I've managed to stock it full of ... stuff... Not that it's not all good stuff. It's good stuff, stuff that I'm going to use (one day). But when is it enough stuff?

I think when it looks like this... This seems to be enough.
In fact, I think I've had enough. 
I know, I know, it doesn't look that bad. Well, you haven't seen the whole thing, and you don't know what's lurking inside. 

Allow me to give you a tour. We'll start on the left side as you enter. 


The top shelf is baking equipment. This includes the electric griddle that is used to make pancakes and things for baking like cookie cutters, food coloring, sprinkles and the like. 
The middle shelf is the baking supplies area. These things are flour, sugar, chocolate chips (and many other assortments of chips) marshmallows, and powdered sugar. Additionally, the carousel on the left has jars and boxes of extra seasoning mixes that do not fit in my spice rack on the wall in the kitchen.
The third shelf in this picture is basically the condiments shelf. This is where all my vinegars (which there are many), syrups, and sauces are stored. Also the little area in the corner is where my "bar" is. Right now, this is a half bottle of grape vodka (whaaatttt??) and a tiny bottle of orange vodka. See I told you this pantry is  a hot mess. 
I don't mean to eliminate this area of the pantry. Most of these things are staples that I like to have on hand.  But perhaps it does need to be organized... That might have to be another post.

Below these three shelves is this:


The top shelf has hot coca and other drink mixes, and the bottom shelf is my "stockpile section". This is where I stockpile things that I go through often, like coffee, coffee filters, garbage bags, and foil. On the floor is my onion/potato storage bins, my margarita stand (the goblets and pitcher are on the shelf above, and a crate of wine (I know).

Let's move to the middle section of the pantry shall we?

The top shelf is my stockpile of paper products (napkins and paper towels).
The next shelf houses things in boxes like crackers, breakfast bars, and granola bars. Next to that are the chips. 
The bottom shelf in this picture stores pasta, taco shells, couscous, and rice. This is one area that I've targeted for my pantry challenge. 

Below this we have the bottom middle section:

 This is also another "problem area". The first shelf is the canned good / jar area. And I have many as you can see. 
And the bottom shelf has drinks. I really don't know why I have all those cans of pop. It's a problem, it really is. And the Bud Light Lime? Yeah, that's left over from a party that I had OVER A YEAR AGO. Stop judging me!!     STOP!!
On the floor is my kitchenaid mixer and a bag of food for the food pantry. 

Next is the right side of the pantry, so here we go:

The top is where I have housed my take and go baking containers... one for cakes and pies and one for cupcakes. Next to that is my lunchbox, and next to that is a bunch of other stuff that's not shown in this photo (like wine bottle carriers).
The next shelf down is the breakfast cereal area and the dog food/treat area. Unfortunately the dog food and treat area has taken over the right side completely on this particular shelf.

And below this:
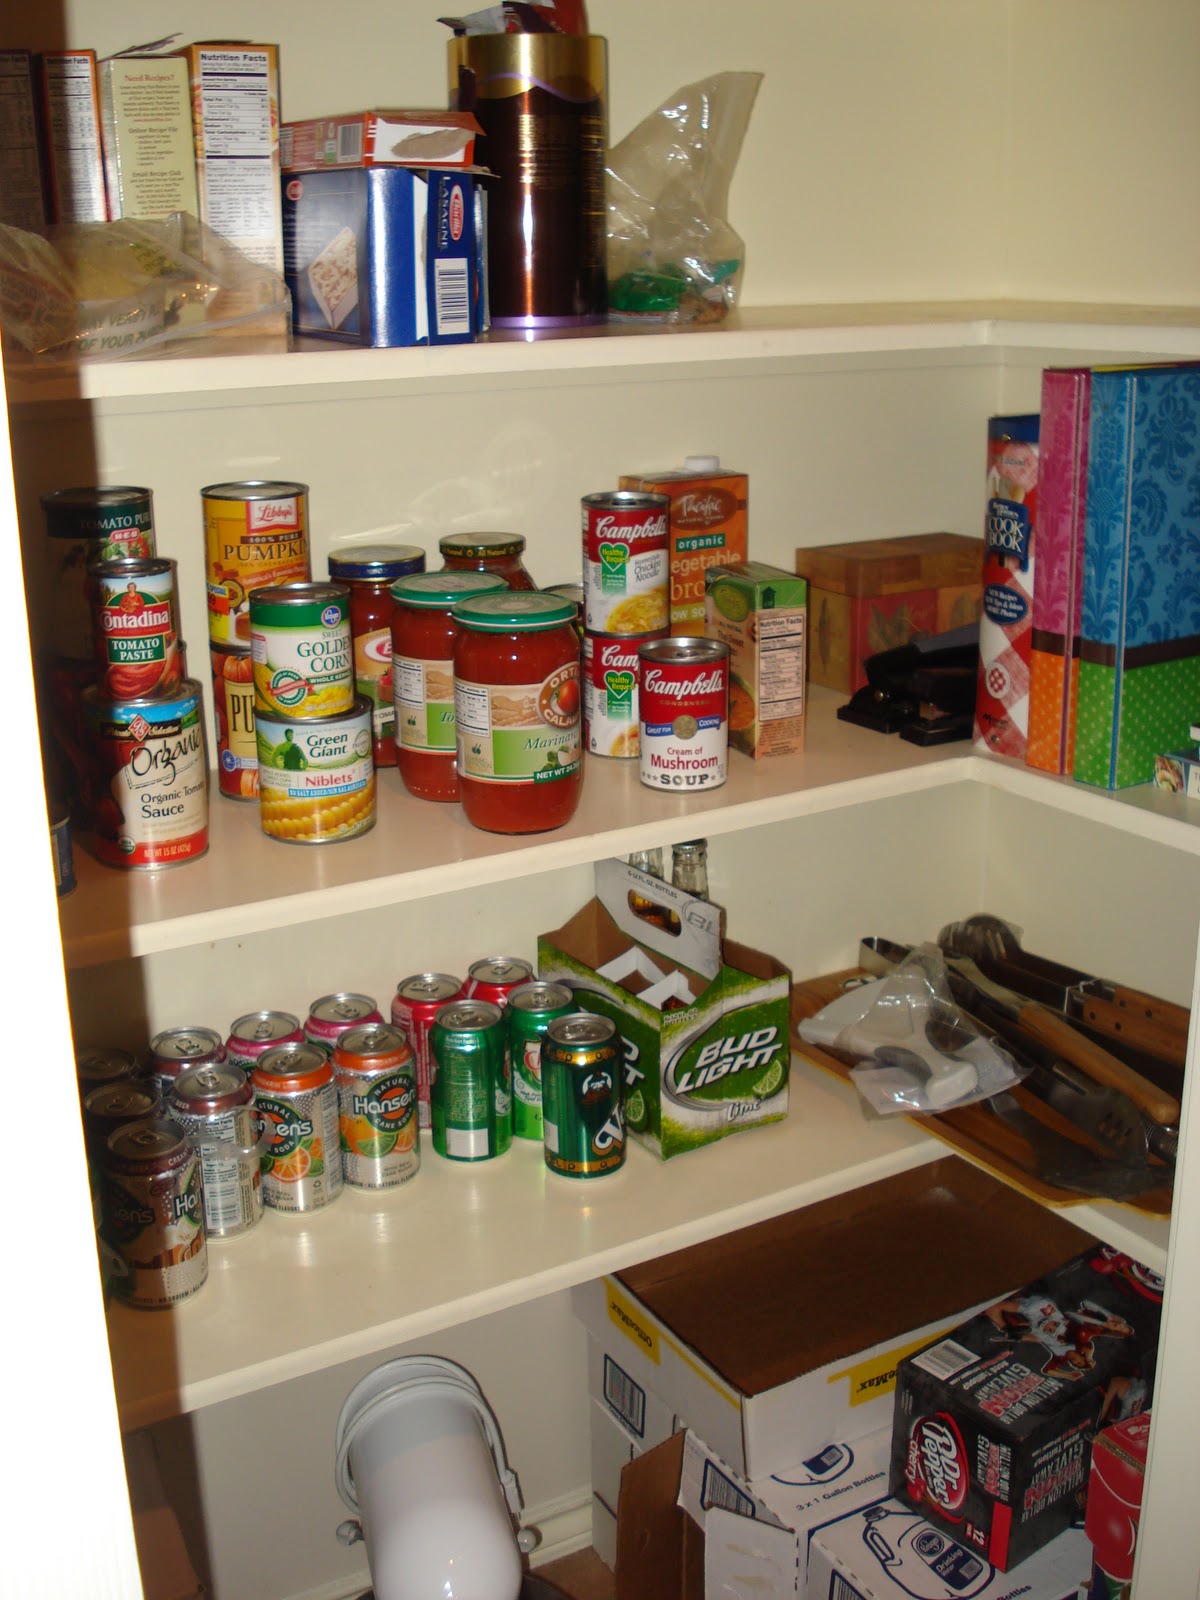
To the right of the cans is my cookbook collection.
Below that are my grilling tools.
And on the floor are Six... SIX gallons of water and a case of Dr. Pepper. The gallons of water may or may not be as old as 2007. Okay, I admit it, they are. Again, stop with the judgement. 

So as you can see, I really have a problem here. So I'm instating what I call the FOOD PANTRY CHALLENGE. This is very serious challenge which means, I am going to try to use up the food I already have in my pantry and in my freezer, instead of buying new (oh, the freezer, we're not even going there, but just imagine the cold version of this pantry) . I am also going to do my best to try to hold off on stockpiling until I feel a severe dent has been made. And lastly, the end result (and the treat for my efforts) is going to be a pantry re-organization including pretty bins and boxes to tidy everything up. 
I will do my part to share my results, stories and successes. Please comment to this post if you have any tips or stories of your own.
Let's start... now. 


Peace, Love, and expired canned goods,
Engineeringirl

Wednesday, November 30, 2011

Validating my need for a craft room - Christmas Present Wrapping!!

I have an entire room dedicated to crafting, which I use a few times a year. You see, I have the intention to use it more, but somehow it just doesn't happen. Sort of like when I mark off all the pages in Martha Stewart Living with good craft and recipe ideas and then end up completing about 2% of them... The intention is there, but sigh... the time is not. So I get super excited when Christmas comes around, and I get to use my craft room for its intended purpose. Years of after Christmas shopping has helped me accumulate gift paper, bows, ribbons, tags, and cards. And I have managed to keep my decorations closet in nice order, storing the gift wrapping supplies neatly in plastic bins for easy access each year.


On the table is a box of ribbons and bows, wrapping paper rolls, packing paper, cards, and gift tags. At my feet is a waste basket and a bin full of gift bags and boxes.

Don't try to spy now... I made sure none of the identifying boxes were sticking out.

I save up boxes through out the year both for shipping gifts as needed and for Christmas time gift packing. Underneath the gift boxes is a stack of packing paper that I also save from shipped items through the year.


Then I put my collection of ribbons and bows as well as gift tags and cards in the corner of the craft table. Of course the tools of the trade (scissors, tape, a pen, and glue for gluing down some pesky bows) are at hand.


The bows and ribbon are kept in a box by themselves to stay easily organized. At the end of the season, they go right back into the plastic bin and are easily accessed next year.

The end result is an ecelcitc mix of wrapped gifts, each one wrapped individually with care.


Don't you wish you knew what was inside these lovely gifts?

So does anyone out there have any gift wrapping tips? I always have to use a lot of tape on the ends... That tri-fold thing is a work in progress :)

Merry Christmas and Happy Wrapping, Engineeringirl

Friday, September 30, 2011

Salute Shuttle

I have given 5 1/2 years of my life to the Shuttle program. Or should I say, the Shuttle program has given 5 1/2 years to me. Over these years, this job has been such an integral part of my world. It has meant a lot of sacrifices and hard work, but I wouldn't have it any other way. I was blessed to be a contributor to a piece of the American Space Program. I would have been considered lucky to have worked one Space Shuttle mission, but I am truly humbled to have been chosen to work 21 Space Shuttle missions as a Shuttle flight controller. It's been an honor to serve my country doing work that I love. The blessings that have been granted and that continue to be lavished upon me cannot be ignored. I know that I am in Houston, far away from family, doing this work for a reason.
I will miss the Space Shuttle program. I will miss driving into work at 4am. I will miss working Holidays and getting "turkey dinners" delivered to mission control from our managers because we didn't get dinner with our friends and family. I will miss not being able to make personal plans because my life revolves around Shuttle launches. I will miss making last minute plans to go home for Christmas because a Shuttle flight slipped.  I will miss working 9+ hour shifts in a building with no windows and having no idea if it's day or light outside but not caring. My world was inside the mission control center, and it didn't matter what the conditions were outside that room. We lived by the orbit of the Shuttle where sunrise happens every 90 minutes. I will miss the camaraderie in the "back rooms" who support the Mission Control room... the group of devoted people who work tirelessly to support their "front room" flight controller. I will miss the pot luck dinners we had because we were not allowed to leave our posts, lest we leave our crew alone. I will miss having to pee so bad because 1) I can only use the bathroom when there is an LOS (loss of signal) with the crew where we cannot communicate with them and because 2) I was so busy during my shift that I forgot I had to pee... nothing else mattered besides getting my job done.  I will miss getting yelled at by flight directors because I hadn't studied hard enough and didn't know the answer, didn't respond quickly enough, or didn't answer with clear and precise words. I will miss watching other flight controllers get yelled at by flight directors for those same reasons. I will miss the sense of pride in their jobs that I felt from every single flight controller I have worked with because they know they do a job that no one else in the world has the opportunity to do. I will miss the chills I got on my arms when I walked into the mission control center.  I will miss the tremendous responsibility to the safety and the life of my crew and the weight of my decisions and my actions. Sometimes I could not believe I had been given the opportunity to work that job. There were many "pinch me moments". I will miss making a decision, telling my Flight Director what the best solution is, and hearing my words go up to the crew. At the time when I was newly certified, it seemed like a 26 year old girl couldn't have that much responsibility, but I did, and they listened to me. There is a way things are done. Tradition matters. Each of us were responsible, no matter our age or where we came from. We listened to the experts no matter how "inexperienced" they seemed. We trusted each other because we knew each of us had proven ourselves to be tough and competent. The standards were set high, and there was no room for error.
With that, I'd like to share a project I've been working on.

I guess you could call it a celebration for the end of the Shuttle program. I had accumulated a few things over the years, a few of which were gifts from a couple crews, so I decided to frame them to fondly remember the time I spend on a project I deeply loved.

From left to right: An STS-133 plaque from a mission where I was the lead planner, graciously signed by my crew. Below that, a montage from STS-127, a mission where I was a part of the lead team, with a patch flown aboard Shuttle, and signed by my crew. In the middle, one of my favorite shuttle pictures surrounded by all the patches representing missions I supported from Mission Control. On top left, the certificate from my flight director when I was chosen to hang the STS-133 mission plaque in the Mission Control Center and a picture with the STS-133 crew. Below that, a montage from STS-133 with a patch flown aboard Shuttle, signed by my crew.

I decided to frame and mat all these myself as it costs a small fortune to have it done professionally. I wrote a blog about this awhile back if you care to find out some tips. For this project, I purchased all the frames (ready made) at Aaron Brothers framing during their buy one get one for a penny sale. Notice I needed 5 frames (not an even number), so I ended up paying full price for one of them (I know). My total was $95. I ordered mats on Americanframe
The 4 frames on the outside look pretty straight forward, but I bet you're wondering how I made the center one... First I decided to go with a very wide mat in order to fit all the patches. I bought the frame and then laid all the patches out, measuring to figure out what size mat accommodated all the patches and what size picture I should go with. I tried two different layouts.
First I laid all of the patches out around the outside but that looked too scrunched to me. Another issue I had with this layout is that the center picture would look weird floating there in the middle and wouldn't be evenly spaced between the top and bottom rows of patches and the sides (ie. there would have been too much plain mat on the side of the photo)

I decided to use this method to make it more symmetrical.
 I then ordered a mat board to fit a 24x36" frame for a 9x12" picture. It was an extra wide mat (sides were 12 1/8", top and bottom were 7 5/8"). I bet you are wondering why all the 1/8" ? It's because you want 1/8" overlap on your picture. So if your picture is 9x12", you need to order a mat that has an opening of 8 3/4 x 11 3/4". It's a lot of math, I know. Use a calculator.
Once I got the mat, I just used double stick tape and a ruler to evenly space out the patches and stick them on the mat.
Also, I ordered my picture on Mpix.com. I ordered it with a "metallic" finish so it's super shiny and pretty. Just perfect for the photo I think. Mpix does a great job. I've ordered many photos from there. Here's a closeup of the final product.

So I bet you're wondering how I got all these frames to hang so nice and straight with evenly spaced margins between all the other frames? Well it wasn't easy. I first had to draw a picture.
Real engineering girls have graph paper with pretty bindings...
And I had to use some tools.
A little kit with picture hanging nails, screws with dry wall screw things since you won't be drilling into the studs, a screw driver, a measuring tape, a hammer, a level, and most importantly - a Bosh power drill (small, lightweight and perfect for engineering girls like me)
All I can say here is MEASURE MEASURE MEASURE. And even after you do that, you still might mess up (I did), so don't get frustrated. It's all part of learning. You can do it girls!!

This was a really rewarding project, but it was definitely hard work to get all those frames to line up. I'm really happy with the results though. Let's see it one more time...


Does anyone out there have any tips for hanging things on walls? Any template short cuts or hints like measuring twice and drilling once? I'd love to hear about it...

NASA for Life!
Engineeringirl

Sunday, September 11, 2011

Savings You Can Salute

I've been wanting a flag forever. It just feels so American you know? There's nothing like an American flag hanging proudly from the front porch. 
There's just something about a cute house with a flag...

I've thought about all the different flags I could hang: Indianapolis Colts, Purdue Boilermakers, Texas state flag, and of course the American flag around Memorial Day and 4th of July. I've got big plans for this project!

I went out to Home Depot and Lowes looking for one at the start of the summer and was shocked to learn it would cost me $46 for the flag pole, flag, and the hardware to mount it on the house. And, even worse, the flag poles were wooden or white with cheap looking hardware. Yuck!
So over Labor Day weekend, Malibu Ken and I tried again. This time we went back to Home Depot. Perhaps there were other flag pole options I hadn't seen? Nope. The options were still the same, and they were just as expensive as I had remembered. However, we did think the mounting hardware for mounting a 1 inch flag pole on the house was a good deal at $6. And even though it was painted white, Malibu Ken so smartly pointed out that we could spray the hardware to Oil Rubbed Bronze or "ORB". (Ever since he started reading Young House Love with me, he's been full of good ideas!).
With that piece of the puzzle solved, we started out for Micheal's Crafts hoping to find a flag pole. We scored a silver flag pole for $10 at Michael's, using a 50% off coupon, which I found using an app on my phone called Geocoupons. An American flag for $9 brought my total for the project to $25. Eat it Home Depot.
Malibu Ken got busy straight away sanding down the silver flag pole with some light grit sand paper I had laying around.
Real studs help their girlfriends with house projects ;)
Next it was time to spray the flag pole and the mounting hardware. We debated about spraying the screws that the mount came with, but decided against that as we thought it would make them "sticky" and harder to actually twist in place. They were a normal silver color after all, so I thought we'd just wait until we were done to see if something needed to be done about that later on.
First we laid all the items to be sprayed out on some extra cardboard scraps on the floor of the garage (far away from the car should the spray can go a little crazy... errrr the person using the spray can)

Then since the end of the flag pole which the finial attached to was actually just plastic, we wrapped it using regular masking tape. This way, it would stay clean, and we could spray the pole and the finial separately and then put them back together without the finial getting stuck on gooey paint.

Spray time using Rustoleum All Surface Paint in "Hammered Brown"
It ended up taking a few coats over the course of a week, and we sort of had a little crisis with the sprayer. See the sprayer is basically a trigger that allows the paint to come out. The trigger got stuck because there must have been a dried paint glob or something. When this happened, we had to stop paint operations. At that time, I thought I would just give Rustoleum a call as their paint can advertised a full refund/replacement if the product did not perform as advertised.
Flash forward to the following weekend when my dad was out visiting... We played around with some spray nozzles that were "borrowed" from other brands of spray paint. The winner ended up being a spray nozzle from some can of window cleaner. We just popped the new nozzle on and finished the paint job. Now that the paint was finished, we hung the mount on the house.
Charlie so graciously lent me his super man drill since all I have is the lady Bosch, which does a fantastic job on many of my projects, but probably wasn't going to cut it on drilling through mortar. So using the yellow super man drill with hammer setting (??), a special drill bit that goes into brick houses, and 1 1/2" special screws that fasten into brick and mortar, my dad put up the mount for me.
Apparently special strong screws must be identified by a neon blue color
So we cut out a mount sized hole in a scrap piece of cardboard, and using another piece as a shield from the wind, sprayed the blue screws to bronze

Now everything matches. Very important.

We still aren't done. Now we had to hang the flag. Who could have thought this would be such a complex project!?
Basically all that's involved here is sticking the flag on the pole and then sliding the flag pole into the mount. Seemed simple, and even though dad did it, I'm pretty sure I could manage in the future whenever I decide to change out the flag. Now picture time!

Pretty quaint huh? And I think just perfect for today 9/11
So what does everyone out there think? Should I stick with the American favorite? Or should I switch to something else for football season? Maybe a Colts flag or a Purdue flag?

Peace and Patriotism,
Engineeringirl

Thursday, September 8, 2011

Best Things EVER - Kitchen Addition

If you've been reading this blog for very long, you may have discovered that I'm a tad OCD. I'm not making light of OCD at all... but I must admit I can be slightly unreasonable in the way I like things done. Maybe I'm just a bit detail oriented? Well it's out there now. I've got my favorite things figured out, and I'm pretty much set in my ways. I guess another way to look at it is I'm a marketing person's dream consumer. Once you have me, I'm hooked. But I have to admit I'm a pretty tough audience. Just because I try it once doesn't mean I'm a forever friend. But  once I find it, I'm a faithful consumer, and I'm not afraid to push share my ideas with others.

Let's start in the kitchen. I love Smart Balance. Vegetable oil for your cakes and brownies?... Smart Balance Oil. Butter for your bread or sauces?... Smart Balance Spread. You can use it and not feel like a fatty. I'm usually anti-substitutes. Like back in High School, my science teacher told me that Sweet n Low made flies grow like 3 heads or something when they were given it in one study. I don't know if this is actually true, but ever since then, I've stayed away from those substitute products. Also, anything that is "fat free" tastes like butt.  Another reason why I don't like that kind of stuff. But ... BUT!!  You cannot tell the difference between the spread and real butter or the oil and regular vegetable oil. I'm for reals.
Lastly in the trifecta of Smart Balance is the Smart Balance milk (lactose free version), which I've recently discovered. I've noticed that ever since I started using this product, I feel less bloated after having milk.


Smart Balance. You can get it at your grocery store, and I've found the best prices at Walmart. Also, these people are always putting coupons in the Sunday paper.

The best ingredients really do make a huge difference. Especially in baking. So splurge on the best flour. King Arthur is the best. Martha says so. It really does make your cookies and your cakes come out fluffyer and just overall... better. You can cut back on the sugar and buy the store brand, but spend the extra cash for the flour. You won't be sorry.

King Arthur All Purpose Flour. You can get this at any grocery store, including Walmart.

I find Turbinado sugar to be far supreme over regular sugar. It just tastes better. At good places like Starbucks, they have it out, but sometimes I ask for it especially at other restaurants and they do have it. I know I'm a freak.  


Sugar in the raw. You can get it at the grocery store.

Ranch makes everything better. The downside is it makes your butt fatter. Not this stuff. You totally can't tell it's lite.
Naturally Fresh Lite Ranch. Find it at Kroger (not HEB) in the veggie section with the refrigerated dressings.

Sour cream is a staple. You shouldn't deprive yourself from tasty sour cream on your chili, tacos, or potato pancakes. But you shouldn't ruin your food buy using nasty store brand light sour cream either. Wanna know a secret? When I get my weekly Bullritos to go, I leave out the sour cream, and use my own at home. Definitely do a dollop of Daisy. (Light)

Daisy Light Sour Cream. You can get it at any grocery store.

NEXT.

Investing in a good set of knives is the first step to becoming a good home cook (or chef). Time for an SAT analogy. Knives are to the cook like paintbrushes are to an artist. When chefs are dismissed on Top Chef, they are supposed to "pack their knives and go".... that's how important they are! They bring them everywhere. 
I'm in love with my Wusthof knives. Like any sane person, I did crazy amounts of research trying to figure out which were the best and which would meet my needs. I even took a knives class at my local Williams Sonoma to study the differences between Wusthof and Shun knives as well as the many uses for the different knives that come in a set. I figured out I didn't need a huge set, and a few would do. After about 5 years, my 8 piece set has been the best investment in my kitchen. The knives still cut the same way they did when I first got them. I highly recommend adding a good set of knives to your kitchen and buying no more than the 8 piece set, if not fewer. A good butcher's knife, pairing knife, and a serrated knife is all you truly need.


Wusthof Knives, 8 piece set (includes block, honer, and scissors). I got mine from Crate & Barrel. They were giving out a free cutting board with the purchase around Christmas time. Note Bed Bath and Beyond does not allow coupons on Wusthof.

You are not a chef (or baker) if you don't have one of these. It WILL change your life. period. First of all, it doesn't even need a descriptor. You say Kitchenaid. People know what you're talking about. Mashed potatoes? Kitchenaid. Cakes? Kitchenaid. Cookies? Kitchenaid. Don't even try to make whipped cream without one of these puppies. What did people do in the stone age? I don't even know. Life was terrible. Get one immediately.
Kitchenaid Mixer. They're sold all over the place. However, I notice Kohl's has good sales around Christmas time. 

The Cuisinart Food Processor is a life saver. You got 10 carrots that you need shredded at lightning speed? I've got a solution for that. Cuisinart. How about a Graham cracker crust that you want to make without getting arthritis? It's another one of those appliances that needs no introduction. Cuisinart. Everyone knows. 

Cuisinart 11 cup food processor. You can get it at Bed Bath and Beyond (don't forget to use a coupon!)

I love my Cuisinart Toaster Oven too. It's actually a convection oven, so it doesn't do that annoying on off on off stuff in order to maintain the temperature when it's heating. It keeps a constant temperature. It's like a little mini oven. I roast asparagus in there and just about anything that's small enough to fit. No sense wasting all that energy to heat up a big oven. I also am not fortunate enough to have a double oven in my home, so the toaster oven can be used as a back up oven for smaller projects. I also like using it to reheat pizza and stuff. I don't like reheating stuff in the microwave 'cause it gets soggy. The toaster oven prevents this from happening. Oh and it also makes toast.

Cuisinart TOB-195 Exact Heat Toaster Oven Broiler. I got mine at Bed Bath and Beyond.

Hopefully that was as helpful for you as it was fun for me. Even though I feel like a total wack job right now. It's scary to think that I might lose it if I weren't able to get Daisy light sour cream or turbinado sugar for my coffee. Is anyone else out there totally OCD when it comes to your favorites? Do tell!

Engineeringirl

Sunday, August 28, 2011

$HAMELESS $AVINGS - And why you should NEVER pay for custom framing

Has anyone out there ever (foolishly) gone into a framing store and gotten a quote for custom framing only to find out that it costs like 5 times more than you had ever imagined it could? I did that about 5 years ago and was literally dumbfounded by how expensive it was, even after calculating the savings from a 50% off coupon! After scraping my jaw off the floor, I found a way around this predicament. In true Lauren fashion, I was 1) not about to pay a gazillion dollars for something that should cost $30, 2) not about to give up and 3) going to get what I wanted. I decided right then and there that custom framing is for suckers. Why? Because you can do it yourself for so much less!

So back to the frames. There are lots of pre-made frames for sale in the framing store. Here in Houston, we have a store called Aaron Brothers Framing. I've found that store has the best selections in the styles I like, but you can apply this method in any store that sells pre-made frames. The general rule of thumb is I try to allow for a 2-3" mat all around the artwork, and I buy a frame in the style I like that fits that criteria. So, for instance, if you have an 8x10" photo you'd like framed, pick out a nice frame sized about 12x14". Now if you're going for a super glam kinda modern look, you can allow for a wider mat. In my living room, I have 8x10" Barbie drawings framed in 16x20" frames with super wide mats. 
One note on frame savings: Many stores (including Aaron Brothers and Michael's Crafts) have coupons all time time. So don't forget to google around for a coupon, which are usually found on the store websites, and print it out to bring with you. Most of the time I will save at least 40% off at Aaron Brothers using a coupon. But if I have a big project in mind, I wait and save 50% during their buy one get one for a penny sale, which happens in July and January. 

But how to solve the issue of the mats? Art doesn't always come in the standard sizes of the pre-made frames. Plus those pre-made mats are pretty darn expensive too! Which brings me to my next point.
You need to know about Americanframe.com. It's kind of awesome.
There is literally every kind of mat quality and color you can imagine. They sell everything from your standard grade mat board to the best archival quality mats. You can enter in your own sizes, down to 1/16 of an inch, and they will make it for you. You end up with a custom made mat, which is EXACTLY what the frame store is doing for you except for they are charging you an arm and a leg for it. And... AND... it's way cheaper than buying those pre-made mats in the stores. For instance, a pre-made basic white mat for an 8x10" picture will run you about $12 at Aaron Brothers, but to order the same mat online, it will cost you around $6. Now, you can always use a coupon in the store to reduce the price, however, the coupons are usually only good on 1 item only. So if you're buying more than one mat or you need specific cuts, online is definitely the way to go. The only time I would recommend purchasing a mat in a store (with a coupon of course) is if for some reason it is an extremely unique mat that you cannot find online. For example, the extra wide mats for my Barbie prints have a silver lining that shows through around the print. I used 4 separate 40% off coupons in 4 separate trips to the framing store so I could snag those puppies at $12 each instead of $20 each.
If you decide to go the online route, here's a tutorial for how to enter in your sizes.
I recommend drawing out a picture of what you want to accomplish. Like here on a project I'm working on, I have a 24x36" frame with plans to frame a 9x12" picture. You want your mat to overlap 1/8" on all sides, so deduct 1/4" from your picture size. Here, I'm really working with a 8 3/4" x 11 3/4" picture. Make sense?
Since the width is 24", I'm left with 7 5/8" on each side. The height is 36", so I'm left with 12 1/8" on the top and bottom.  This is exactly the information I need for my order.

 24 bucks??!!
I've placed my order, and now I'm just waiting for the mats to come in the mail, which should happen this week.  Soon I'll be able to share the project I'm working on!

So now you know how to get the best deals on frames and mats. What to do next? Get your frame home, and open it up very carefully (I'm sure there's a tool for peeling back those metal clasp things on the back of the frames, but I just use an old pair of scissors).  Once you get it open and are ready to slide your artwork in, ensure there are no stray fuzzies etc on the glass. You don't want to get your frame put back together only to find a piece of fuzz or a paint chip floating around inside. Then put in your mat in first, followed by your item being framed, then the back of the frame. Push the metal tabs back in all around the back, and attach the hanging hardware onto the back of the frame. Voila! You now have a professional piece of framed art! And you aren't broke!

Happy framing everyone,
Engineeringirl

Sunday, August 7, 2011

Patio Furntiure - It's About Time

I've been working on this house for over 5 years now. Room by room, I've slowly filled them with furniture, painted their walls, and cost effectively decorated and redecorated. So far, I hadn't made it outside to my back patio yet. While I have visions and far away dreams of a giant pergola covered paver stone patio with planter walls, plenty of crate and myrtle trees, fruit trees, a shed , compost pile, rain barrel and a garden, I have started the first step by purchasing patio furniture. My dad got me a World Market gift card for my birthday, but so far, I was not able to stomach paying the high in-season prices for patio furniture. So I waited paitienly until the end of the season. Finally last week, prices were discounted to 50% off, and nothing makes this girl happier than a sale!

Happy sale dance!!
I decided to get the bench, 2 occasional chairs and the coffee table. And... AND!!! I had a 15% off coupon! For all 4 pieces (and a cute tray that was also on sale), my total was $311.82. After using my gift card, it was even less than that... Not bad ehhh?
I brought the bench and the coffee table home and put it together that night. And I picked up the 2 chairs after church the next day, since not all pieces would fit in my car in one trip. I put the chairs together last night and hauled it all outside to my back paito.

See Lola likes it too


The nautical pillows aren't actually outdoor pillows, but the sales person at World Market said the cushions should be stored indoors, so I figured if I was going to be only keeping the cushions and pillows outdoors whenever I was using the furniture and storing them inside all other times, it would probably be fine to get regular throw pillows. These are from Overstock, and I got a good deal on them too. (coming to a $hameless $avings post near you)

So does anyone out there have any outdoor furniture stories? Anything I should know about the new additions to my paito? Or does anyone else have big patio dreams like mine?

Friday, April 1, 2011

Curb Appeal

One of my favorite things about this time of year is the pretty landscaping that starts popping out all over the neighborhood. Time for planting brightly colored flowers and freshly mulched beds. Especially after the hard freeze we experienced here in Houston over the winter, the beds in my area definitely were in for some freshening up. I know, I know... a "hard freeze" is like it gets really really cold. Everyone freaks out because there might be some snow flakes for like .3 seconds. But seriously, our plants aren't like those up north and just can't handle the cold weather. So after winter was over, I had to end up pulling up a bunch of plants. And a few weekends ago, I was off to the local garden center, coupons in hand. After walking around the garden center for what felt like an eternity, I finally selected some varieties to fill in my landscaping.

It doesn't look like a lot here but I got 8 plants total.
 I was most excited to bring home this thing.

I saw a something like it with a twisty branch when I was at Disney World last year. I had to have it.

So after the very arduous experience of choosing plants and setting them in the beds where I wanted them to be planted, I called Alex, the landscaper. And voila.


Twisty branch tree with purple flowers


Lamb's Ears, so soft

Redish Purpleish grass thing-y

Agave plants. Very Cactus-y.
I'm glad I made the time and put in the effort for this home improvement. A few plants, a few bags of mulch, and a check to Alex for approximately the amount of a good time at Express went a long way.